Aerial Photography Tips for Helicopter Tours of Rio de Janeiro
RIO DE JANEIRO, BRAZIL
One of the best ways to see any city is from the air and Rio de Janeiro is no exception. What’s even better? With the doors off the helicopter!
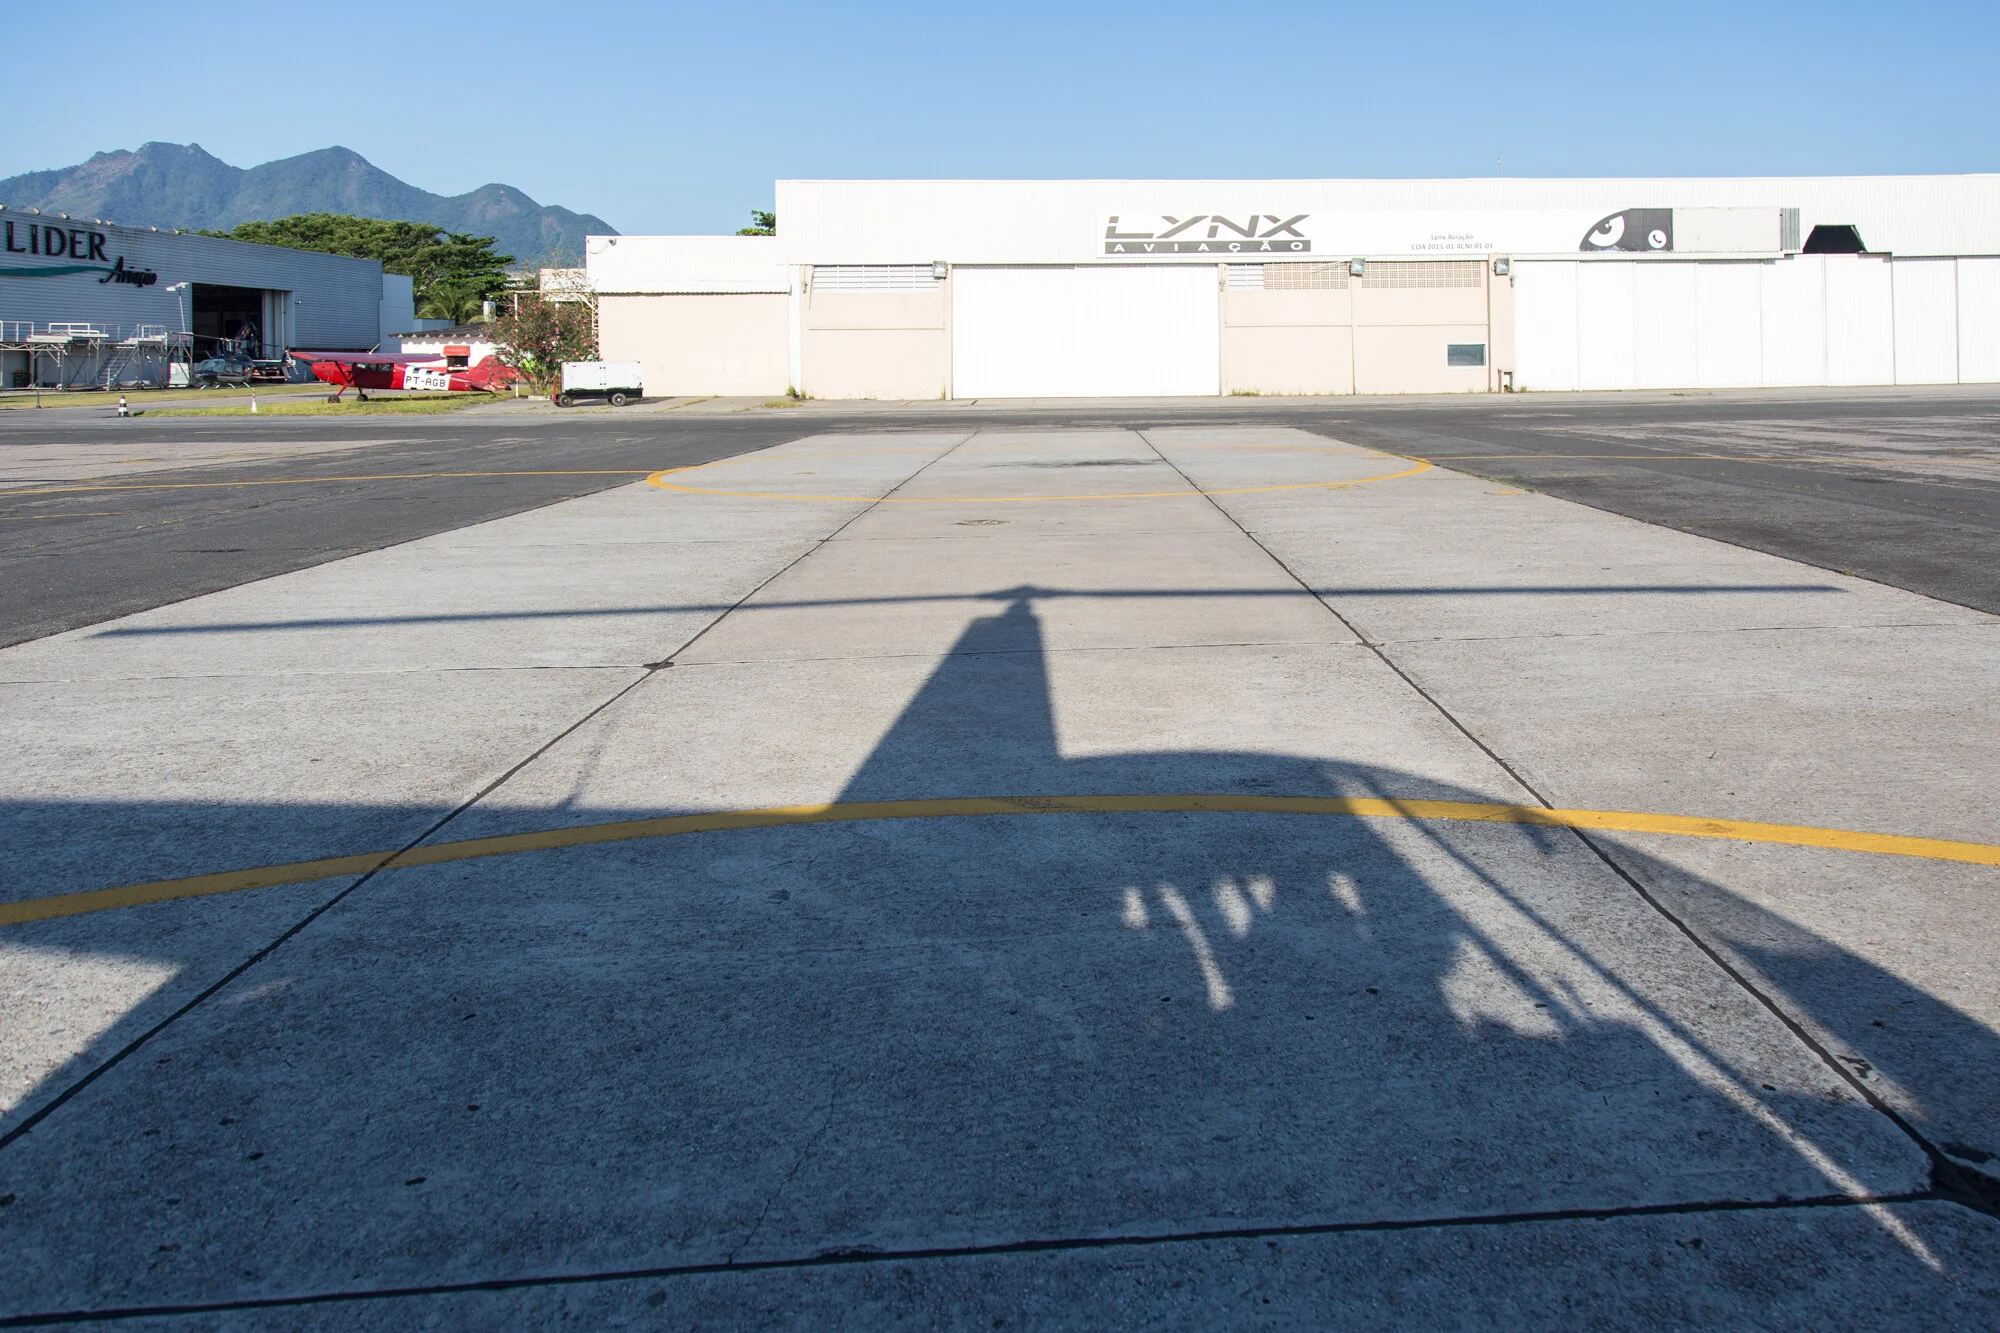
Most of the tours that you find online or around Rio (in the touristy areas) offer flights for around 7-13 minutes for approximately $200 US. However, since Amanda was already in Brazil, she was able to do some research and find us a helicopter tour company (Comandante Nobre) that offered a 30-minute, doors off, photography tour of the city for less than $175 US (550 BRL). The only down side was that the tour left from Aeroporto de Jacarepaguá (AEROJAC), which is about 30 minutes from Ipanema. This wasn’t an issue for us as we just caught an Uber over to the airport and it cost us less than $10 US (30 BRL).
When we arrived, we were greeted by the friendliest employees. They had us complete all of the necessary paperwork and gave us a flight briefing. The helicopter was a Robinson R44 that had the doors removed off of the left side. Because Amanda isn’t a big fan of flying, they kept the doors on the right side (also where the pilot sat) so that she felt more comfortable. One other photographer went with us on the flight and he sat in the front seat next to the pilot and Amanda and I sat in the back. Each seat has a headset that you can listen to the pilot’s narration and also communicate with him. This was a big plus on a photography flight so that you can let him know when you want to get an important shot and where to position the helicopter. We put on our headsets and away we went.


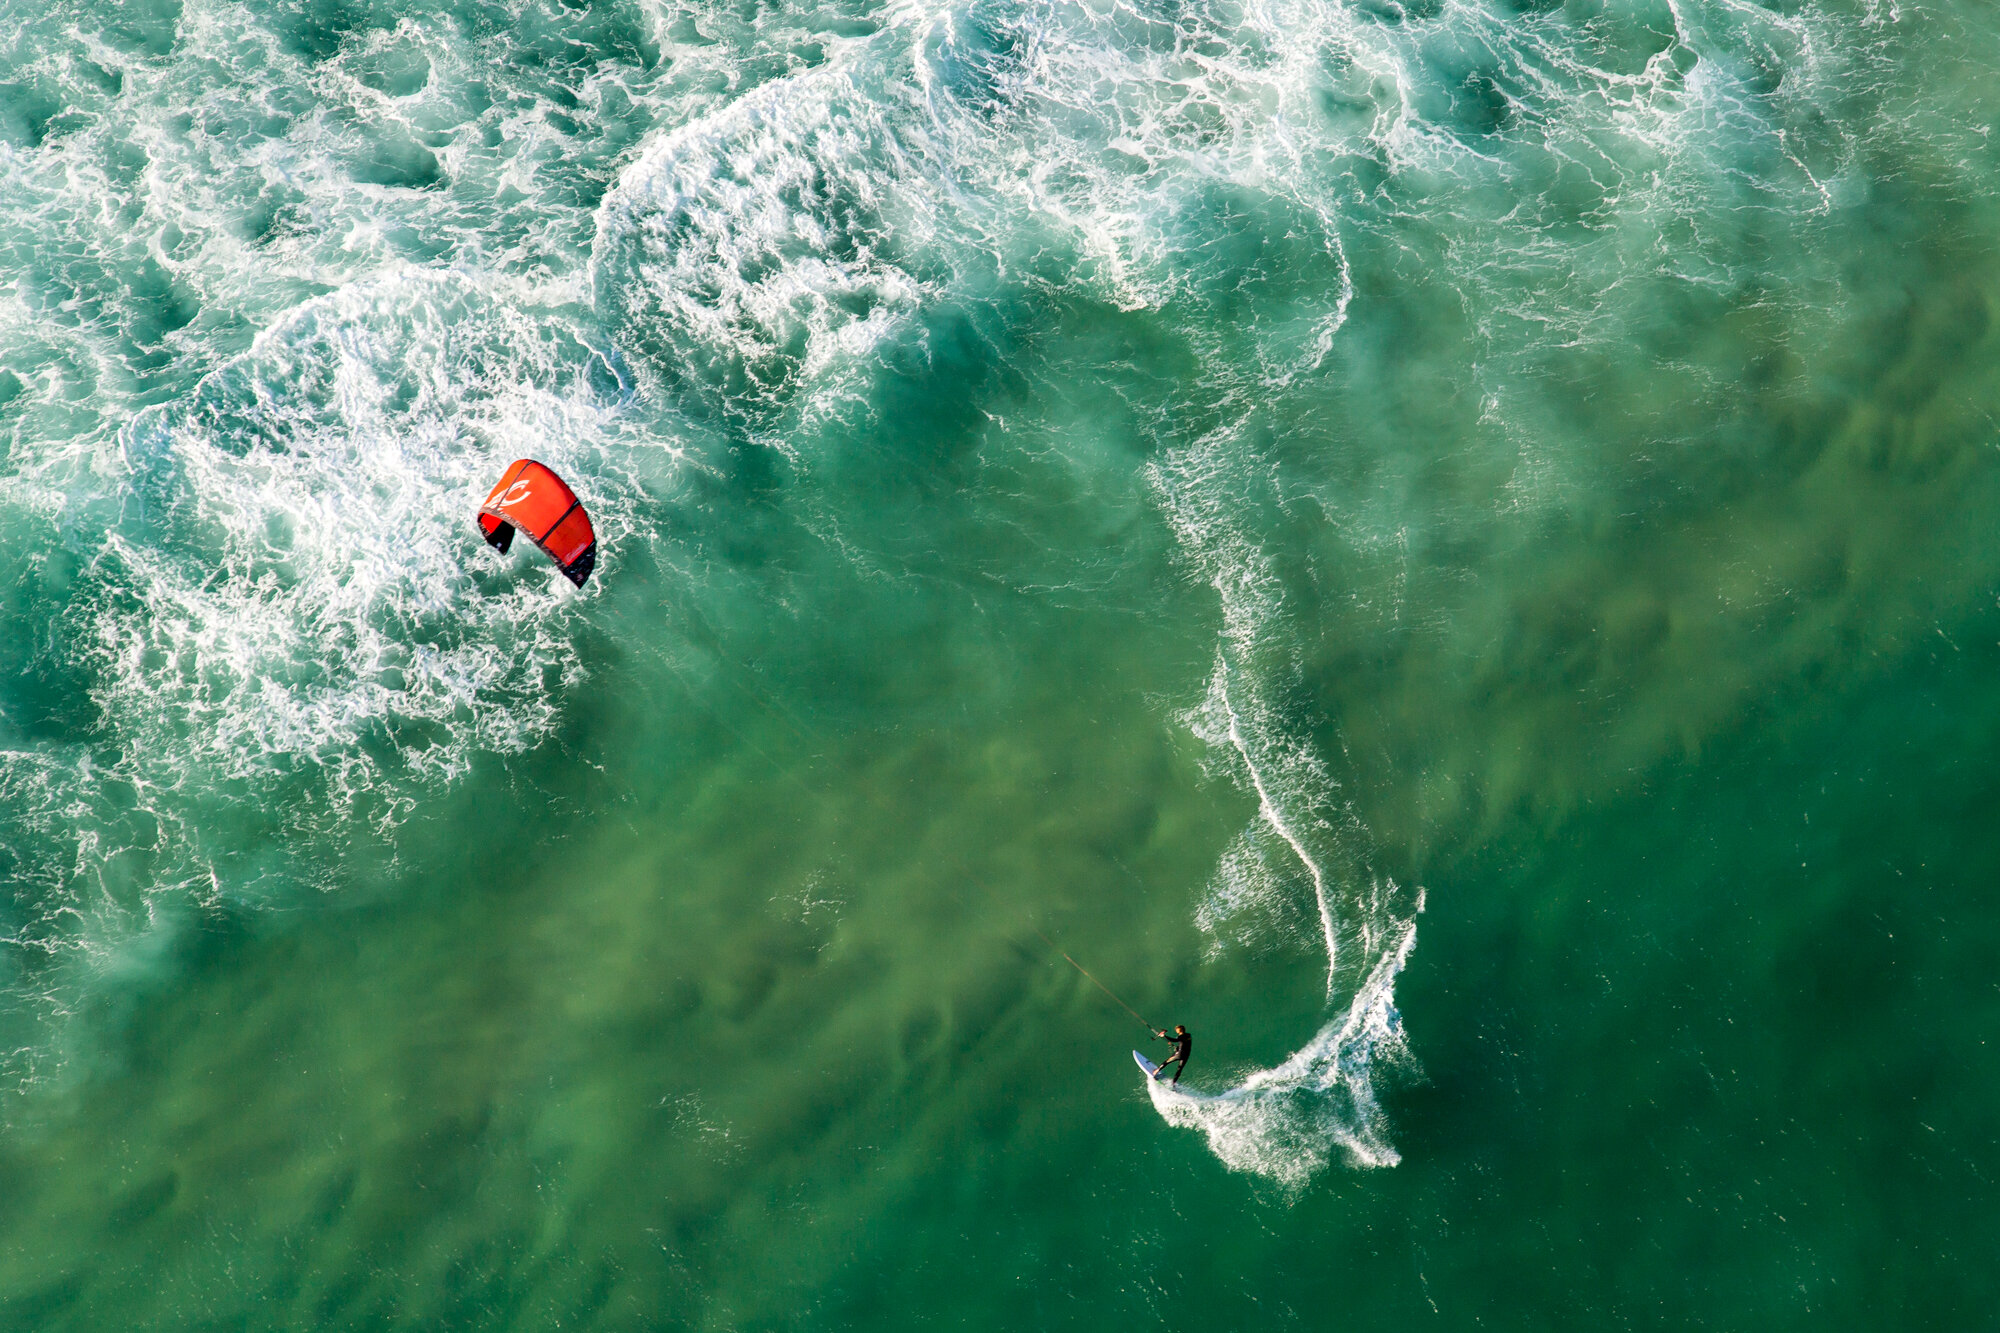
Departing the airport, we were able to get great views of Barra da Tijuca and the various lakes as we headed for the coast. You also couldn’t miss the massive Pedra da Gávea in the distance. As soon as we made it to the ocean, there were so many kite surfers enjoying the windy day. We headed east along the shoreline, where the pilot pointed out the Beverly Hills of Rio and the Clube Costa Brava. Seeing the spectacular homes sitting along the coast reminded me of my southern California flights along Malibu and La Jolla. It wasn’t but just a couple minutes before the mansions turned to slums as we approached a couple of favelas, Rocinha and Vidigal. As these two neighborhoods came into view, I couldn’t help but think of the incredibly expensive real estate that they occupy.


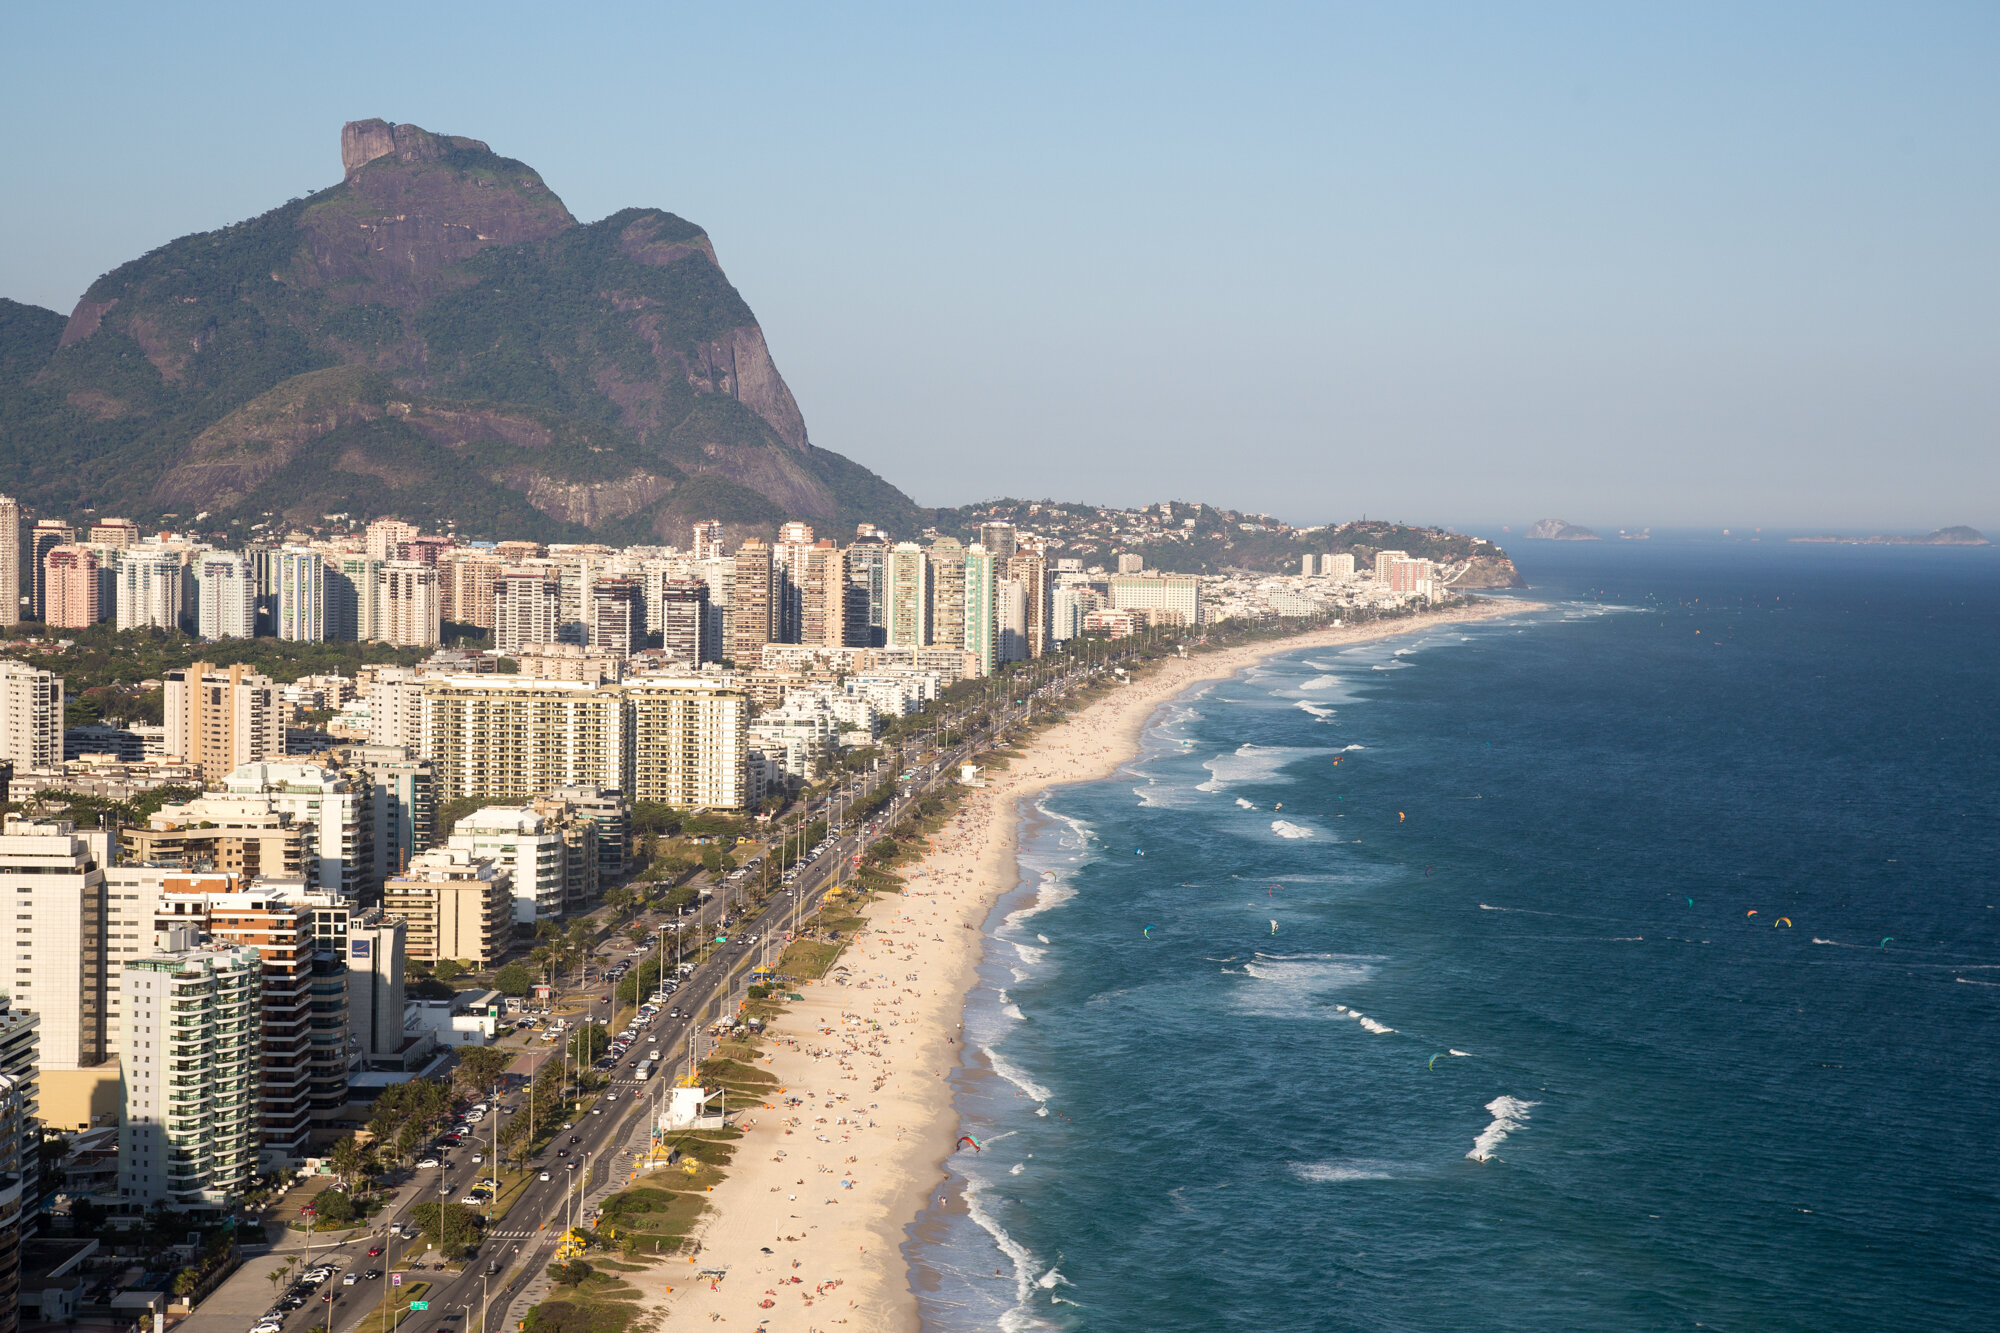


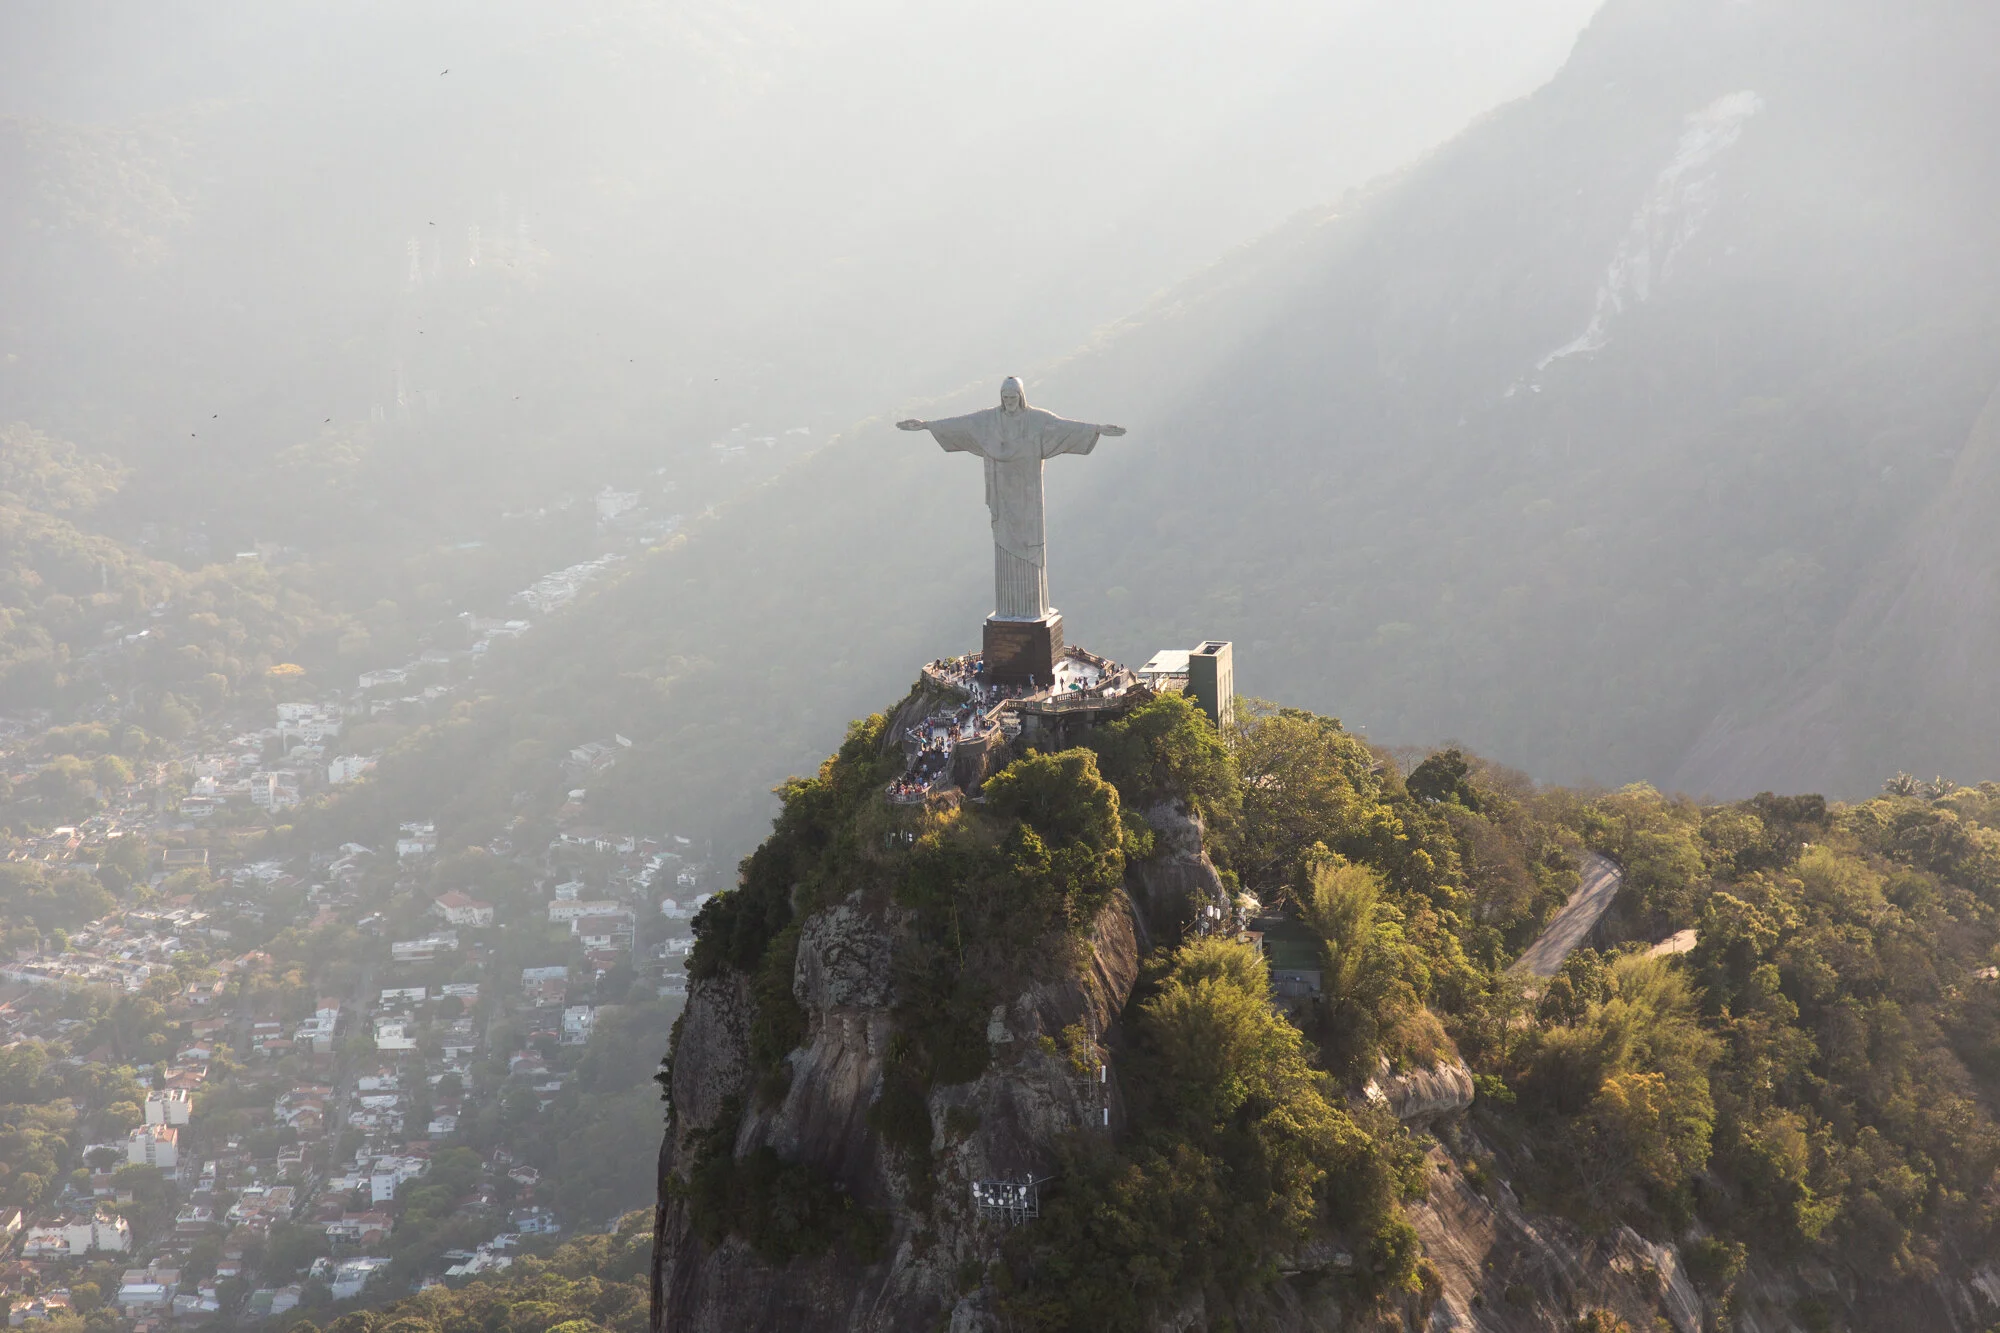
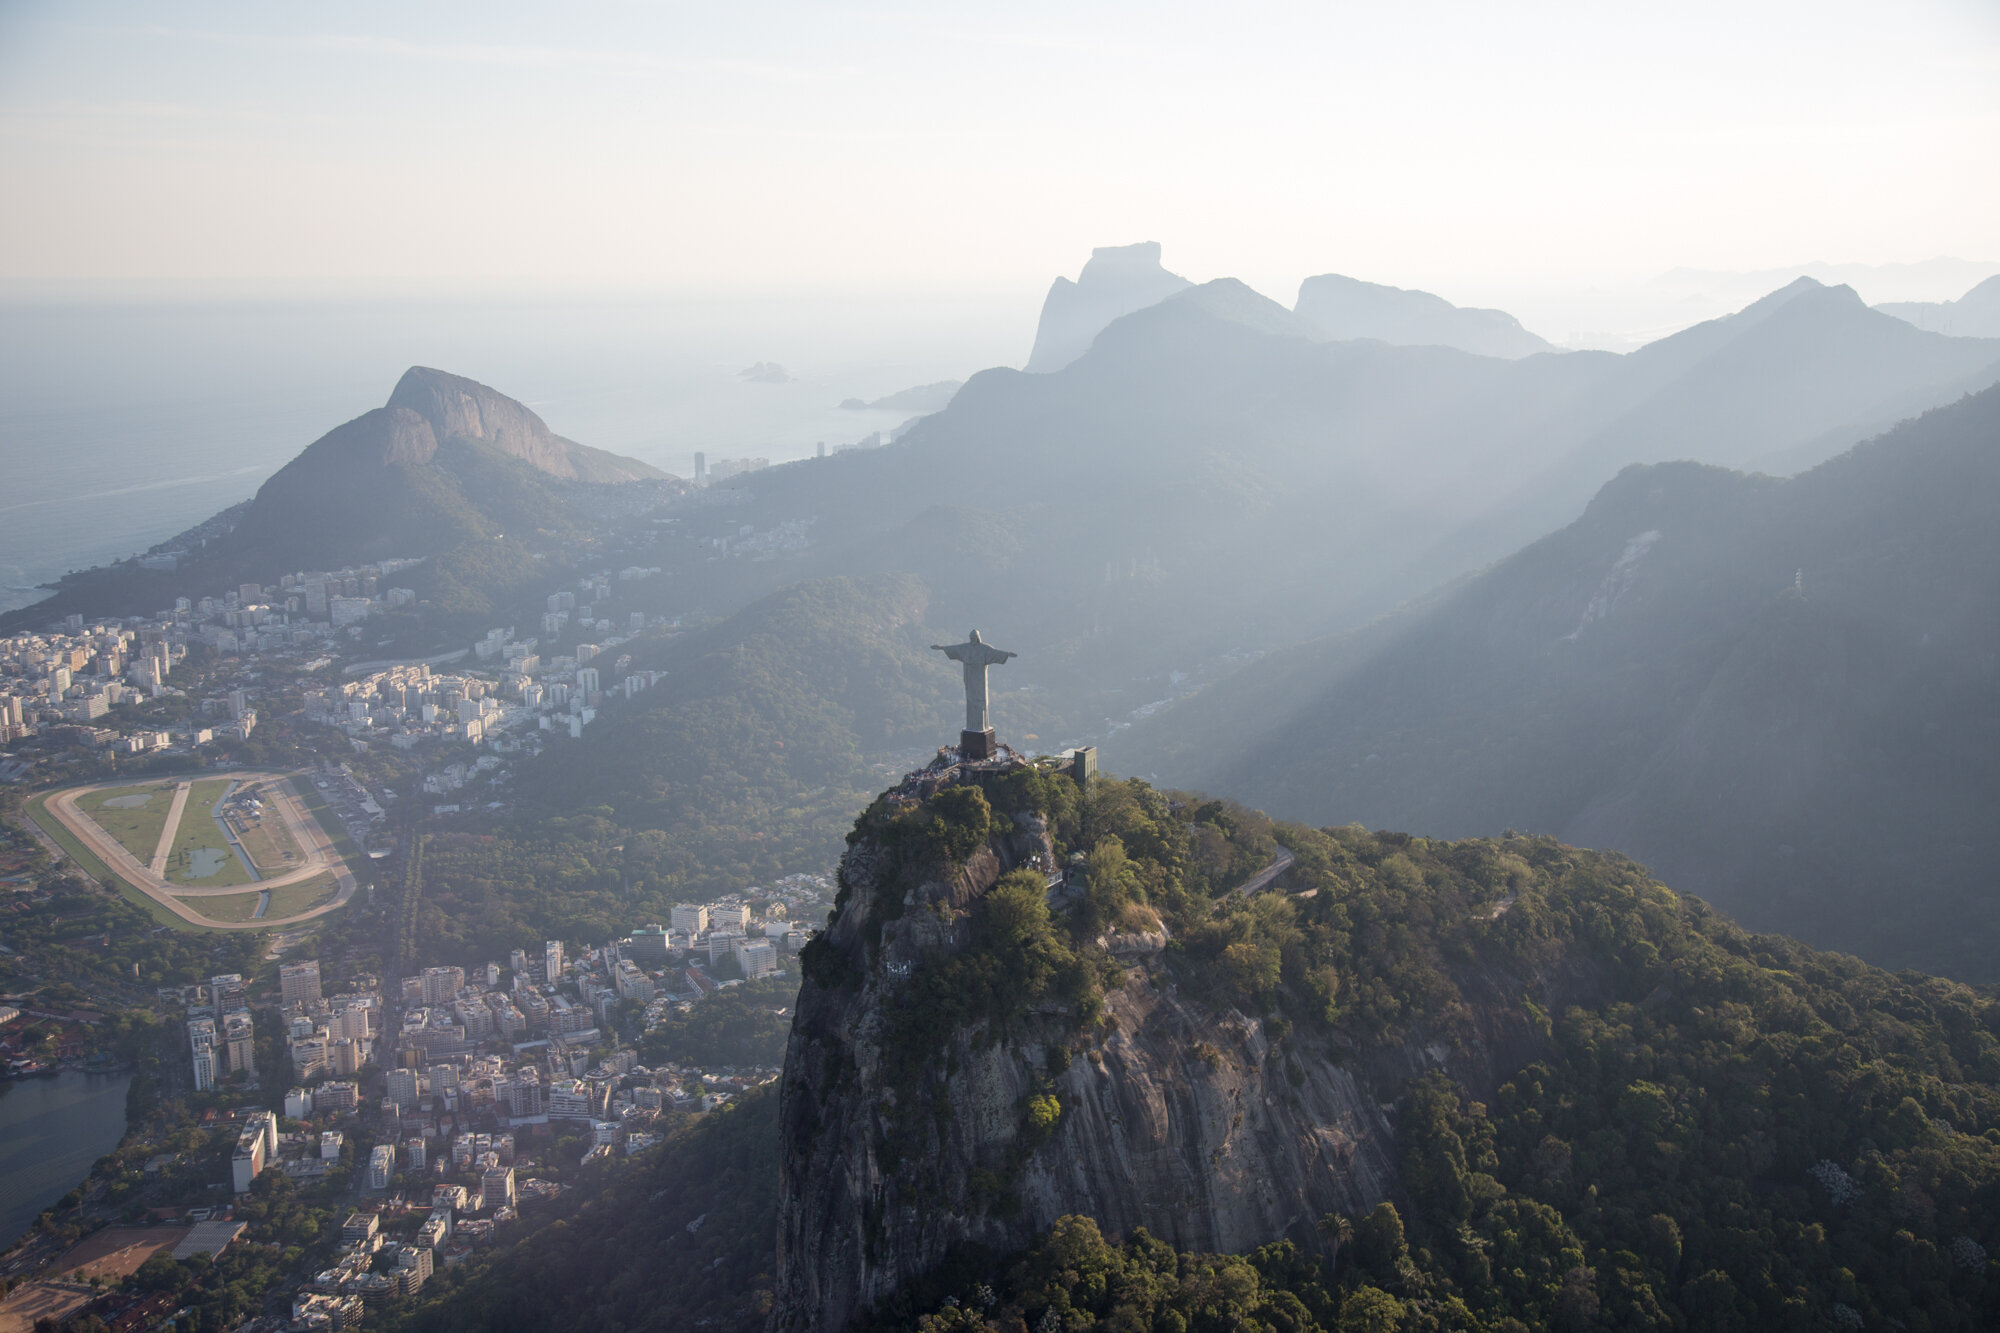
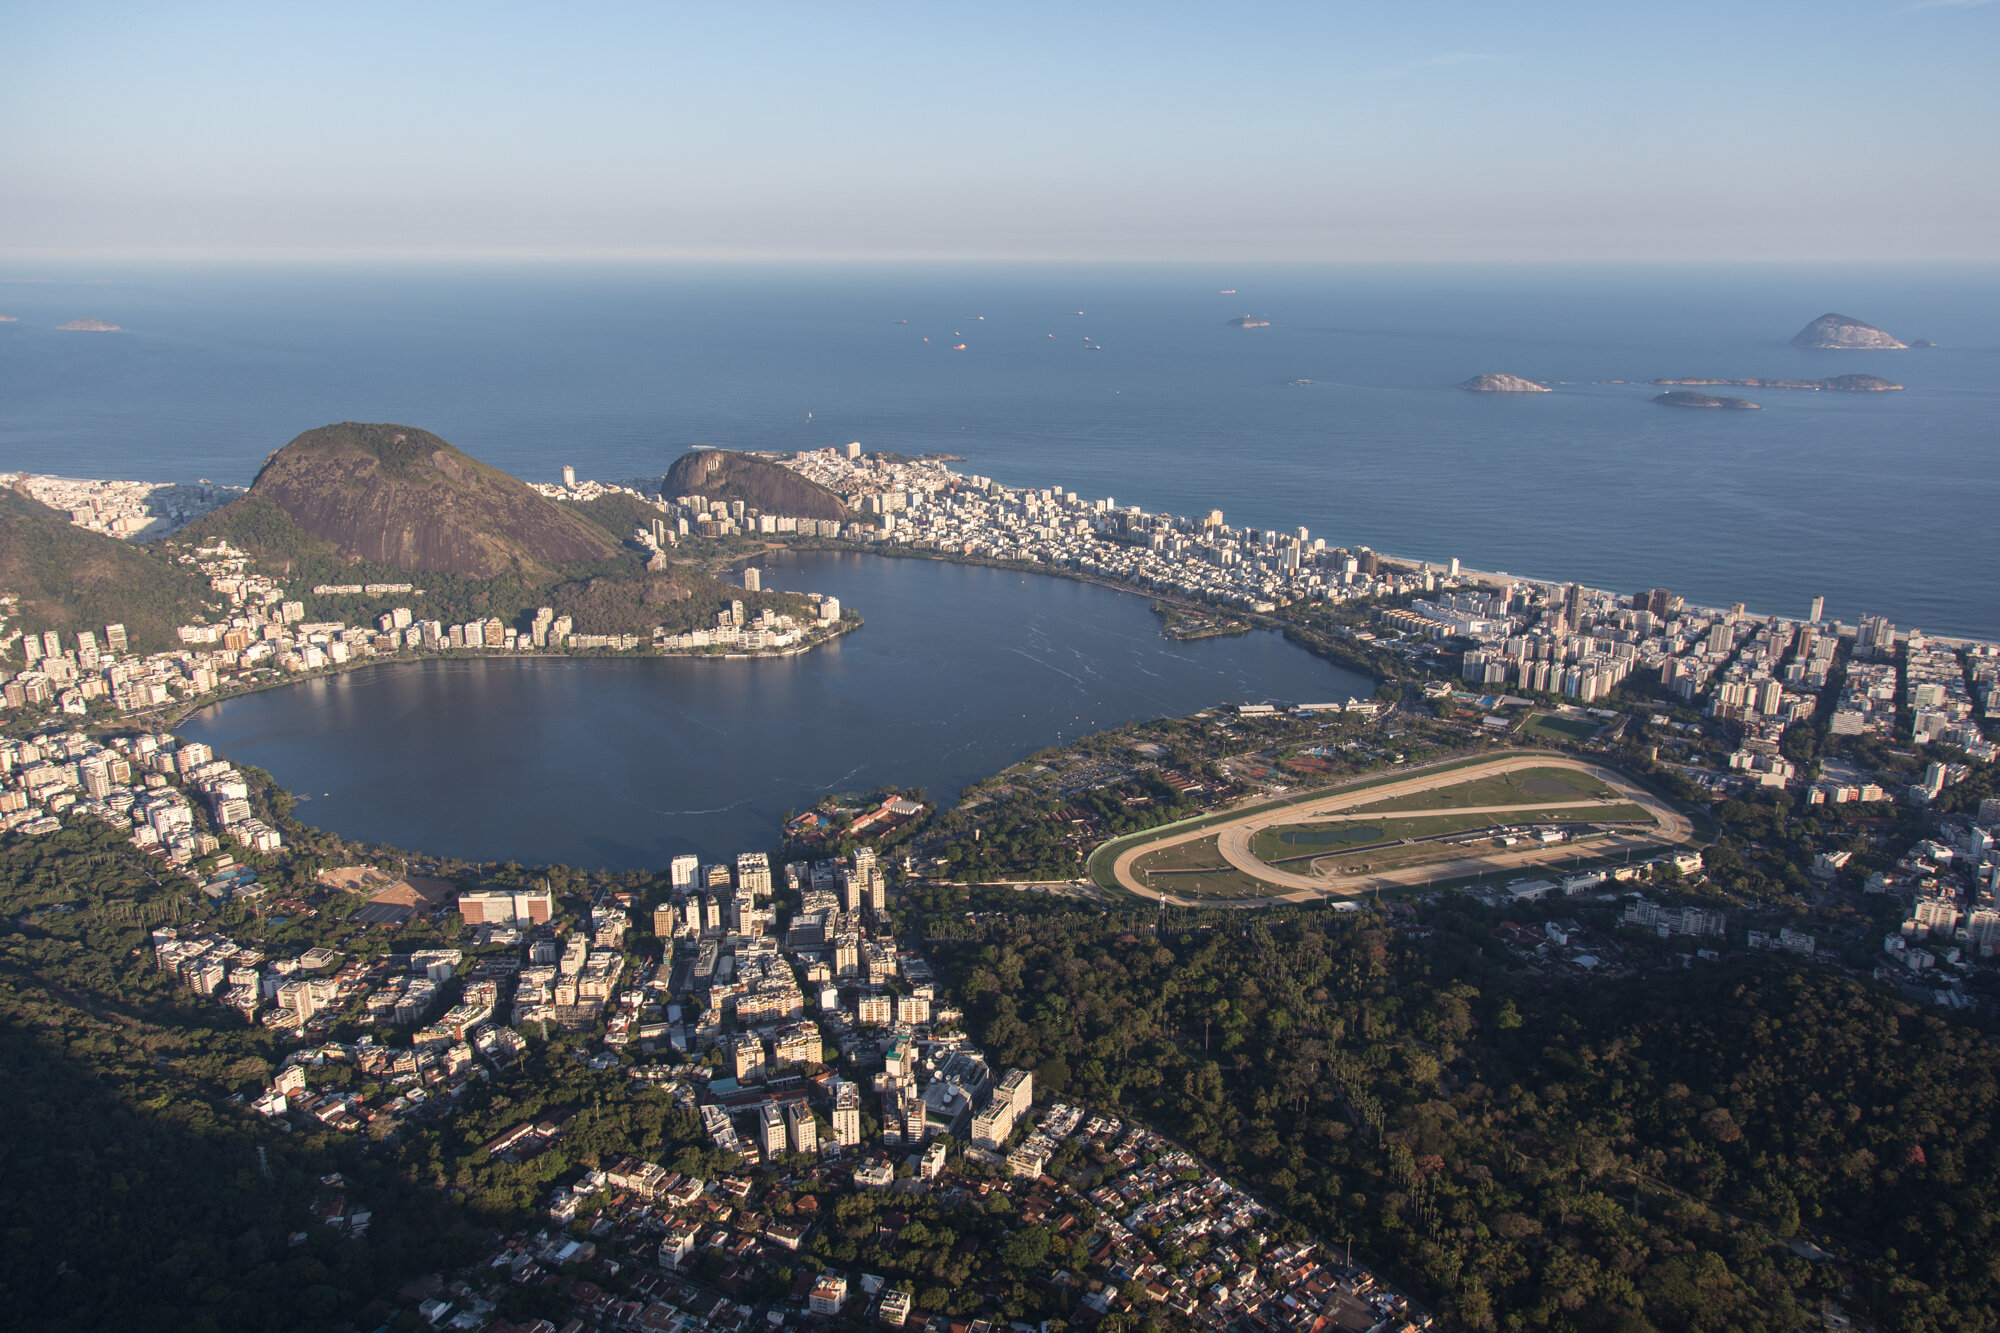
The villages in the mountains soon gave way to the more populated tourist beaches of Leblon and Ipanema. The aerial view of Leblon and Ipanema were impressive with the number of hotels lining the beaches. I was able to spot Praia Ipanema Hotel (where we were staying) and you could see Lagoa Rodrigo de Freitas just behind it along with the horse track at Jockey Club Brasileiro. This was also my first view of Christ the Redeemer from the air. We quickly came to Pedra do Arpoador and Forte de Copacabana, which separates Ipanema from Copacabana.


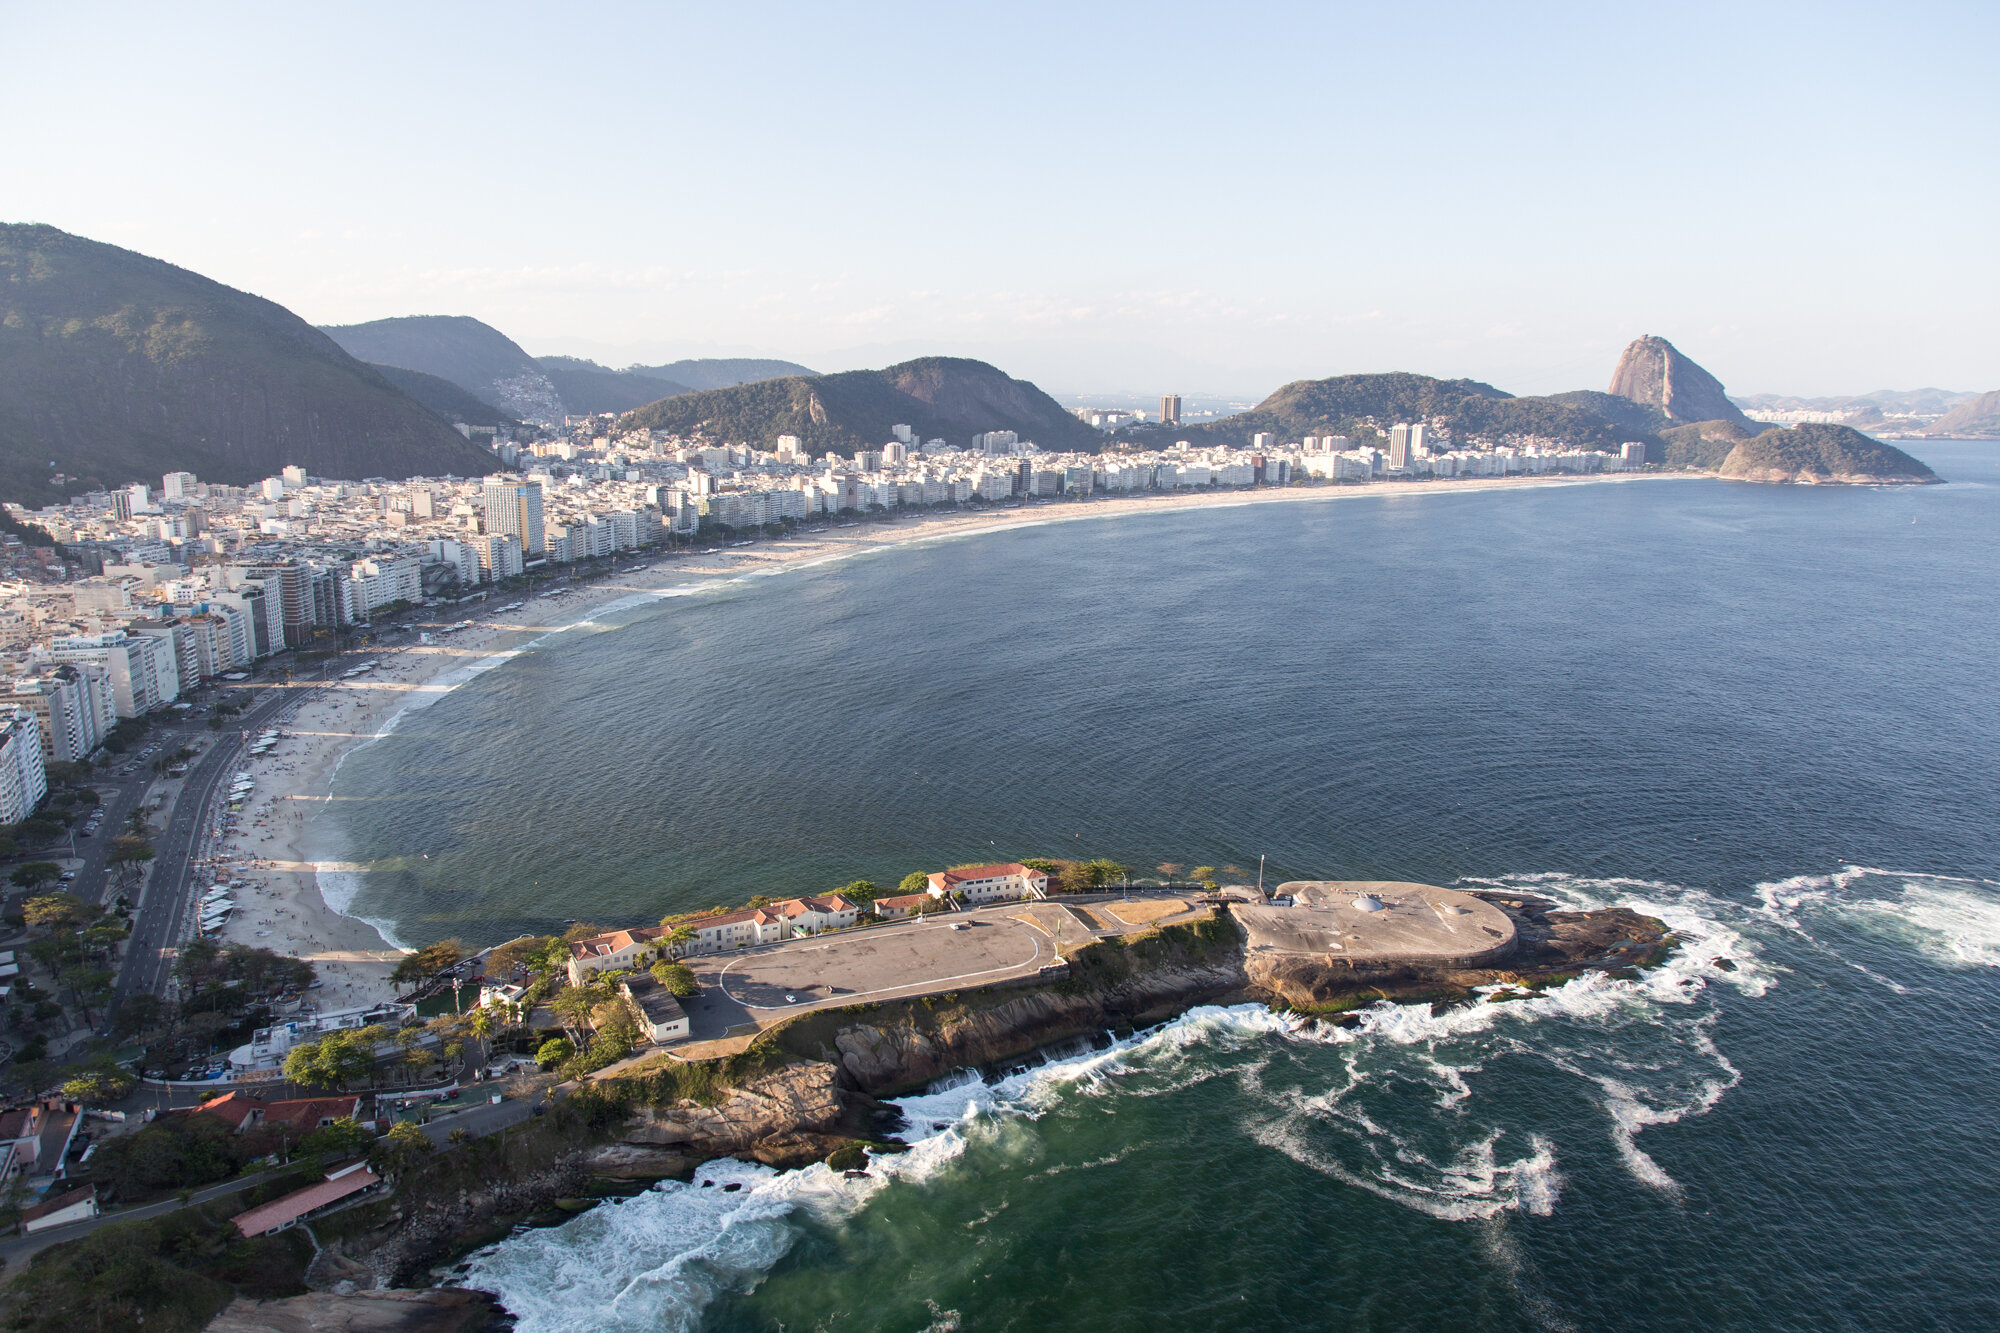


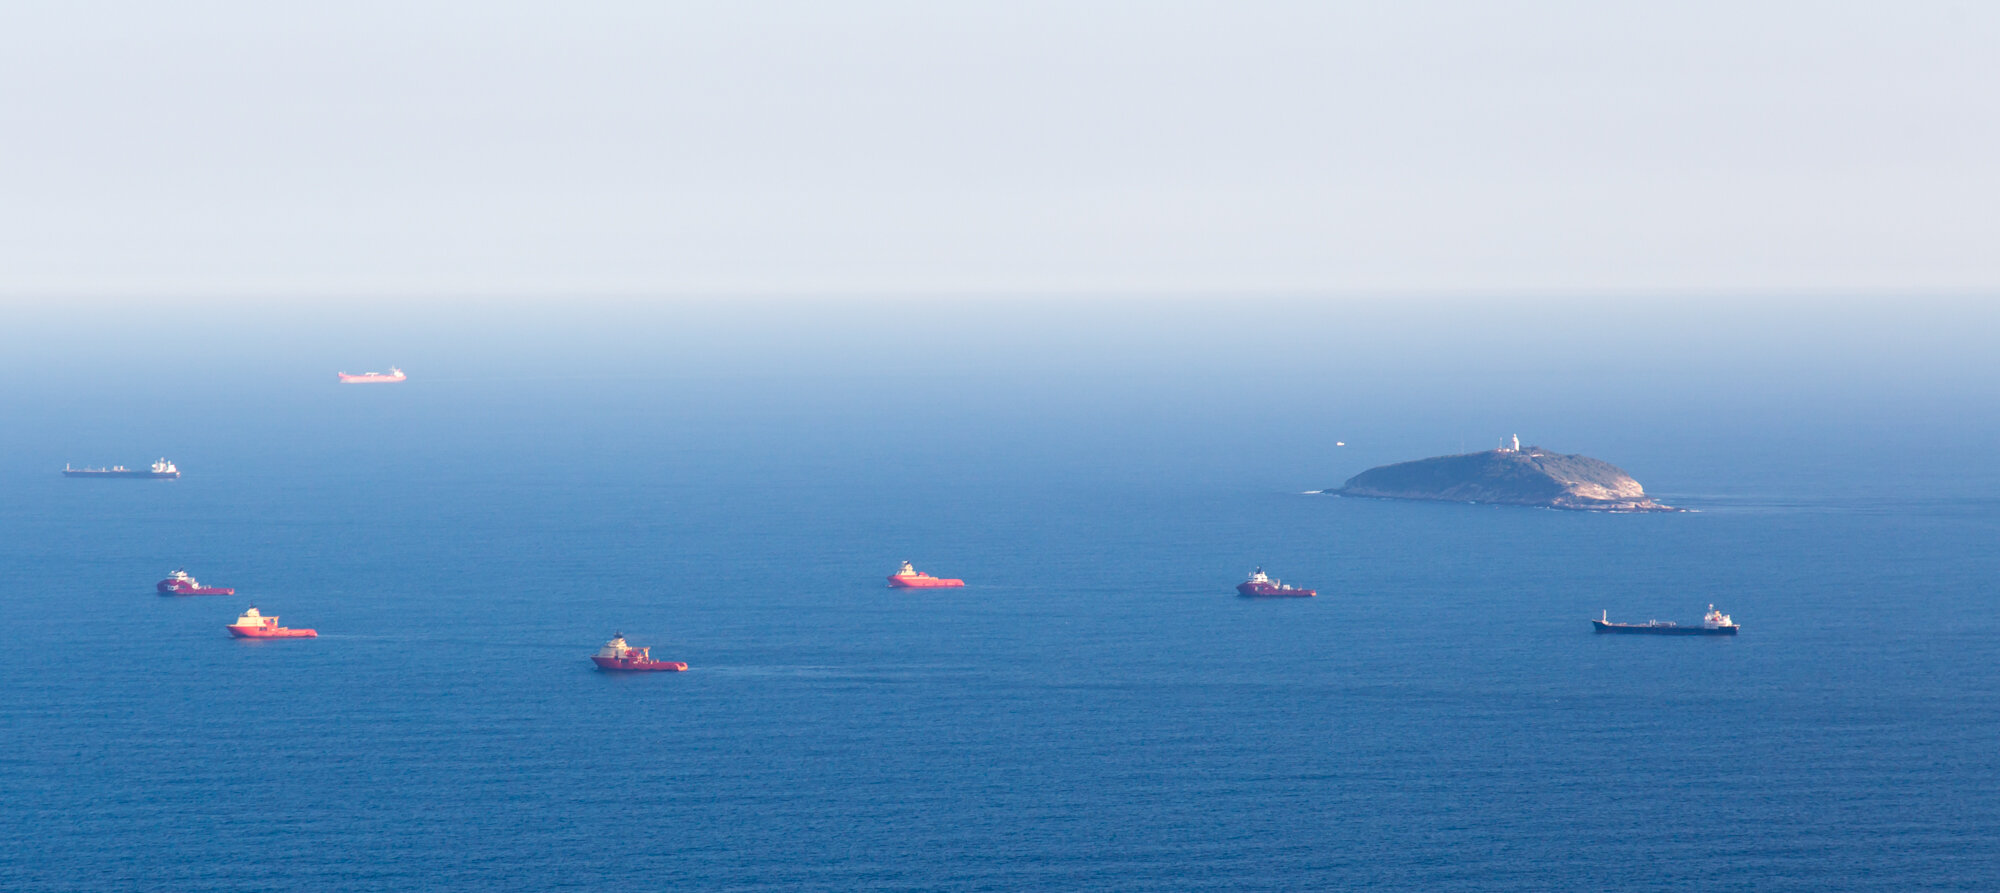
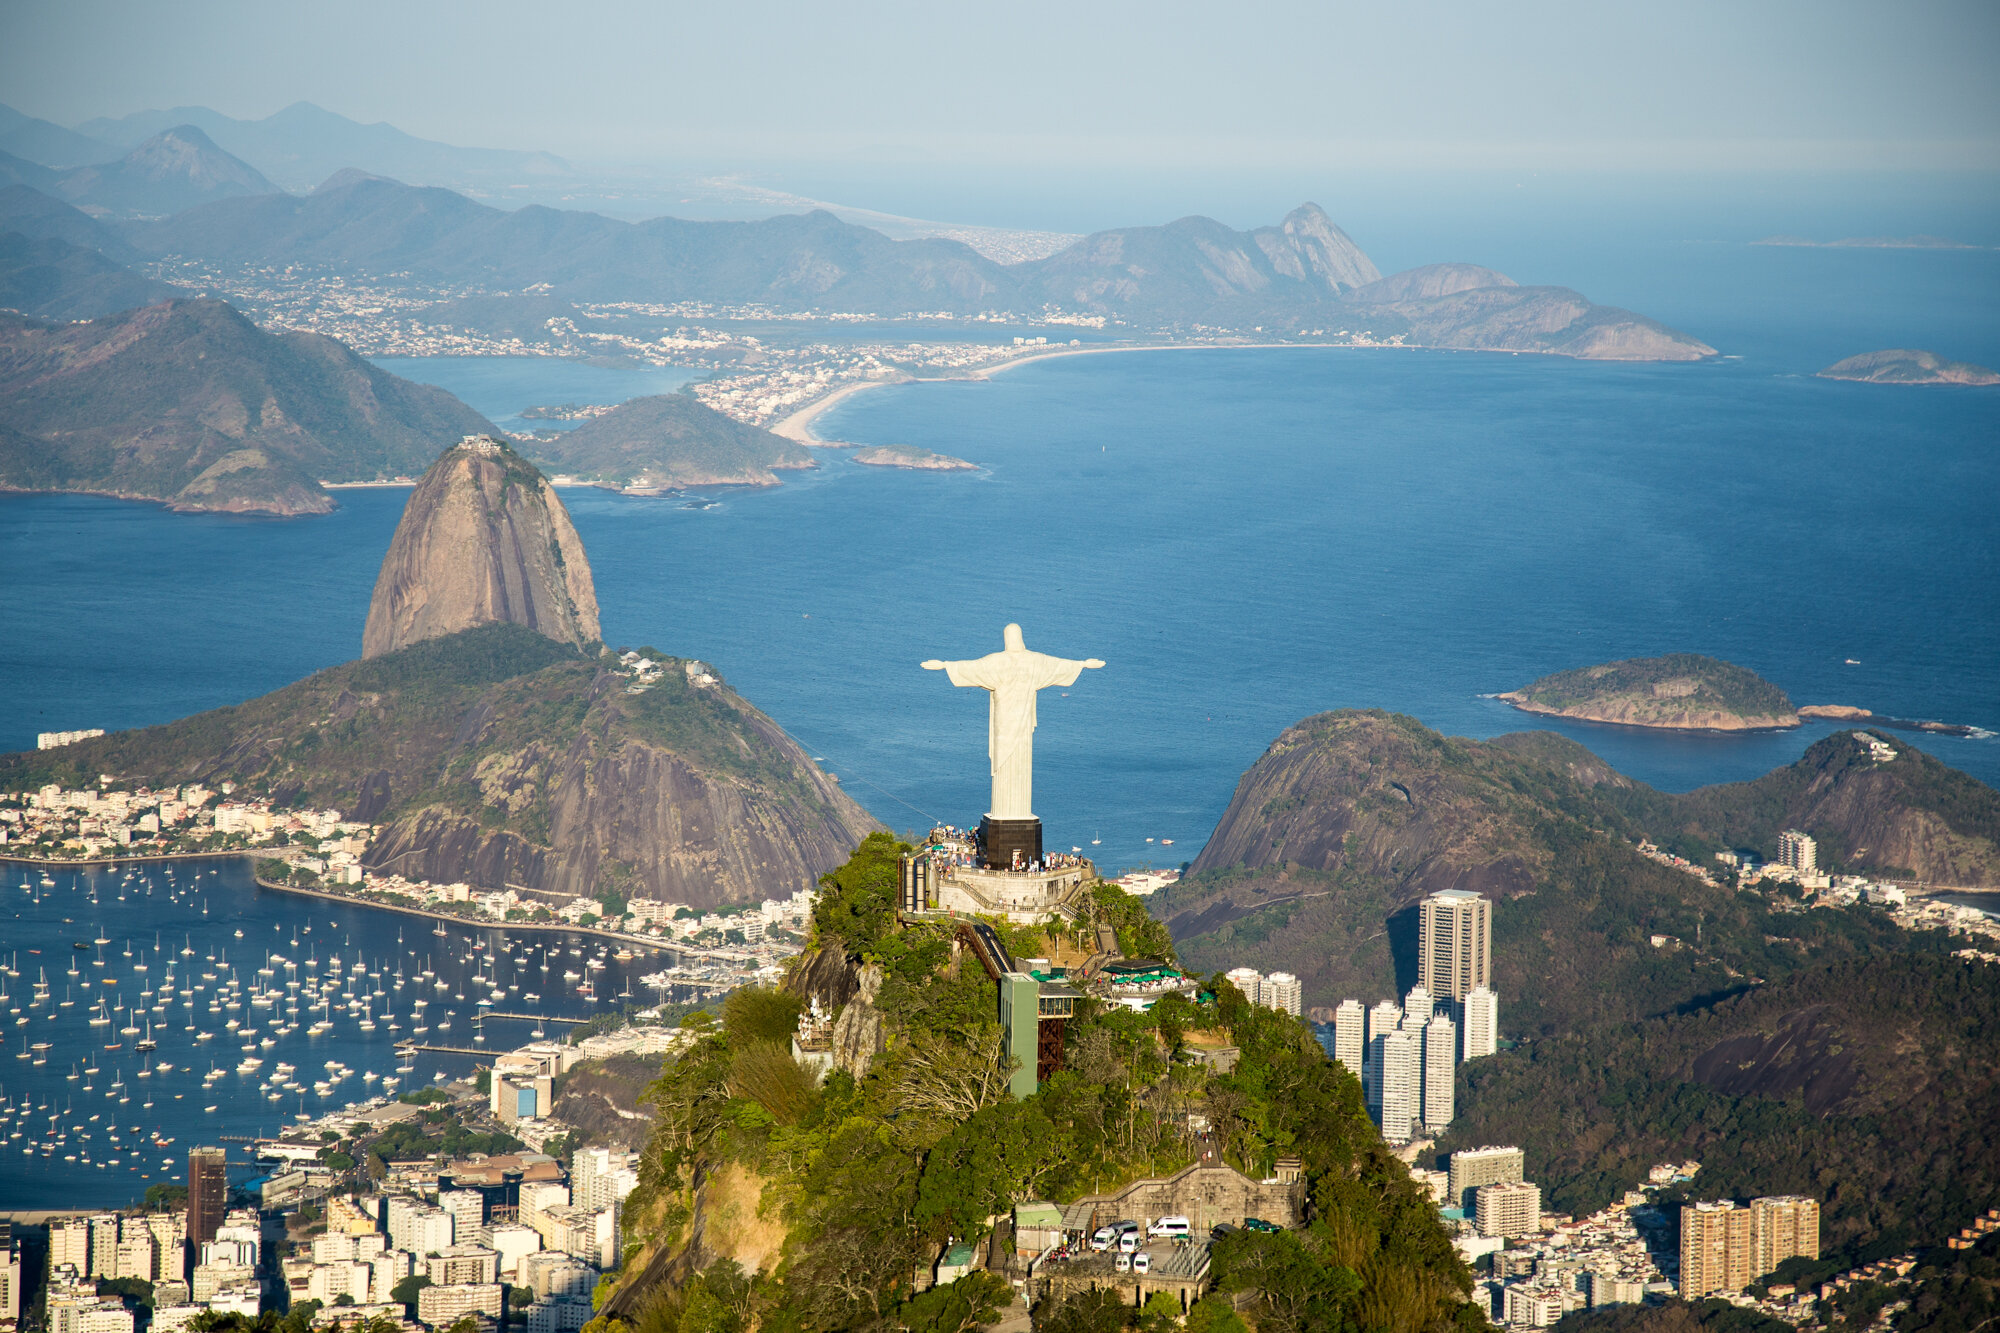
Copacabana was just as busy as Leblon and Ipanema. You can tell the difference between Ipanema beach and Copacabana beach by the pattern on the sidewalks (look closely at the pictures). As we made our way down Copacabana beach, you could start to see Sugarloaf coming into view. It was a beautiful sight in the afternoon light to see the beautiful city or Rio melting into the mountains. From that vantage point you could also look out and see just how many islands there are around Rio de Janeiro. It was also the perfect place to get a view of all three beaches, Copacabana, Ipanema and Leblon.


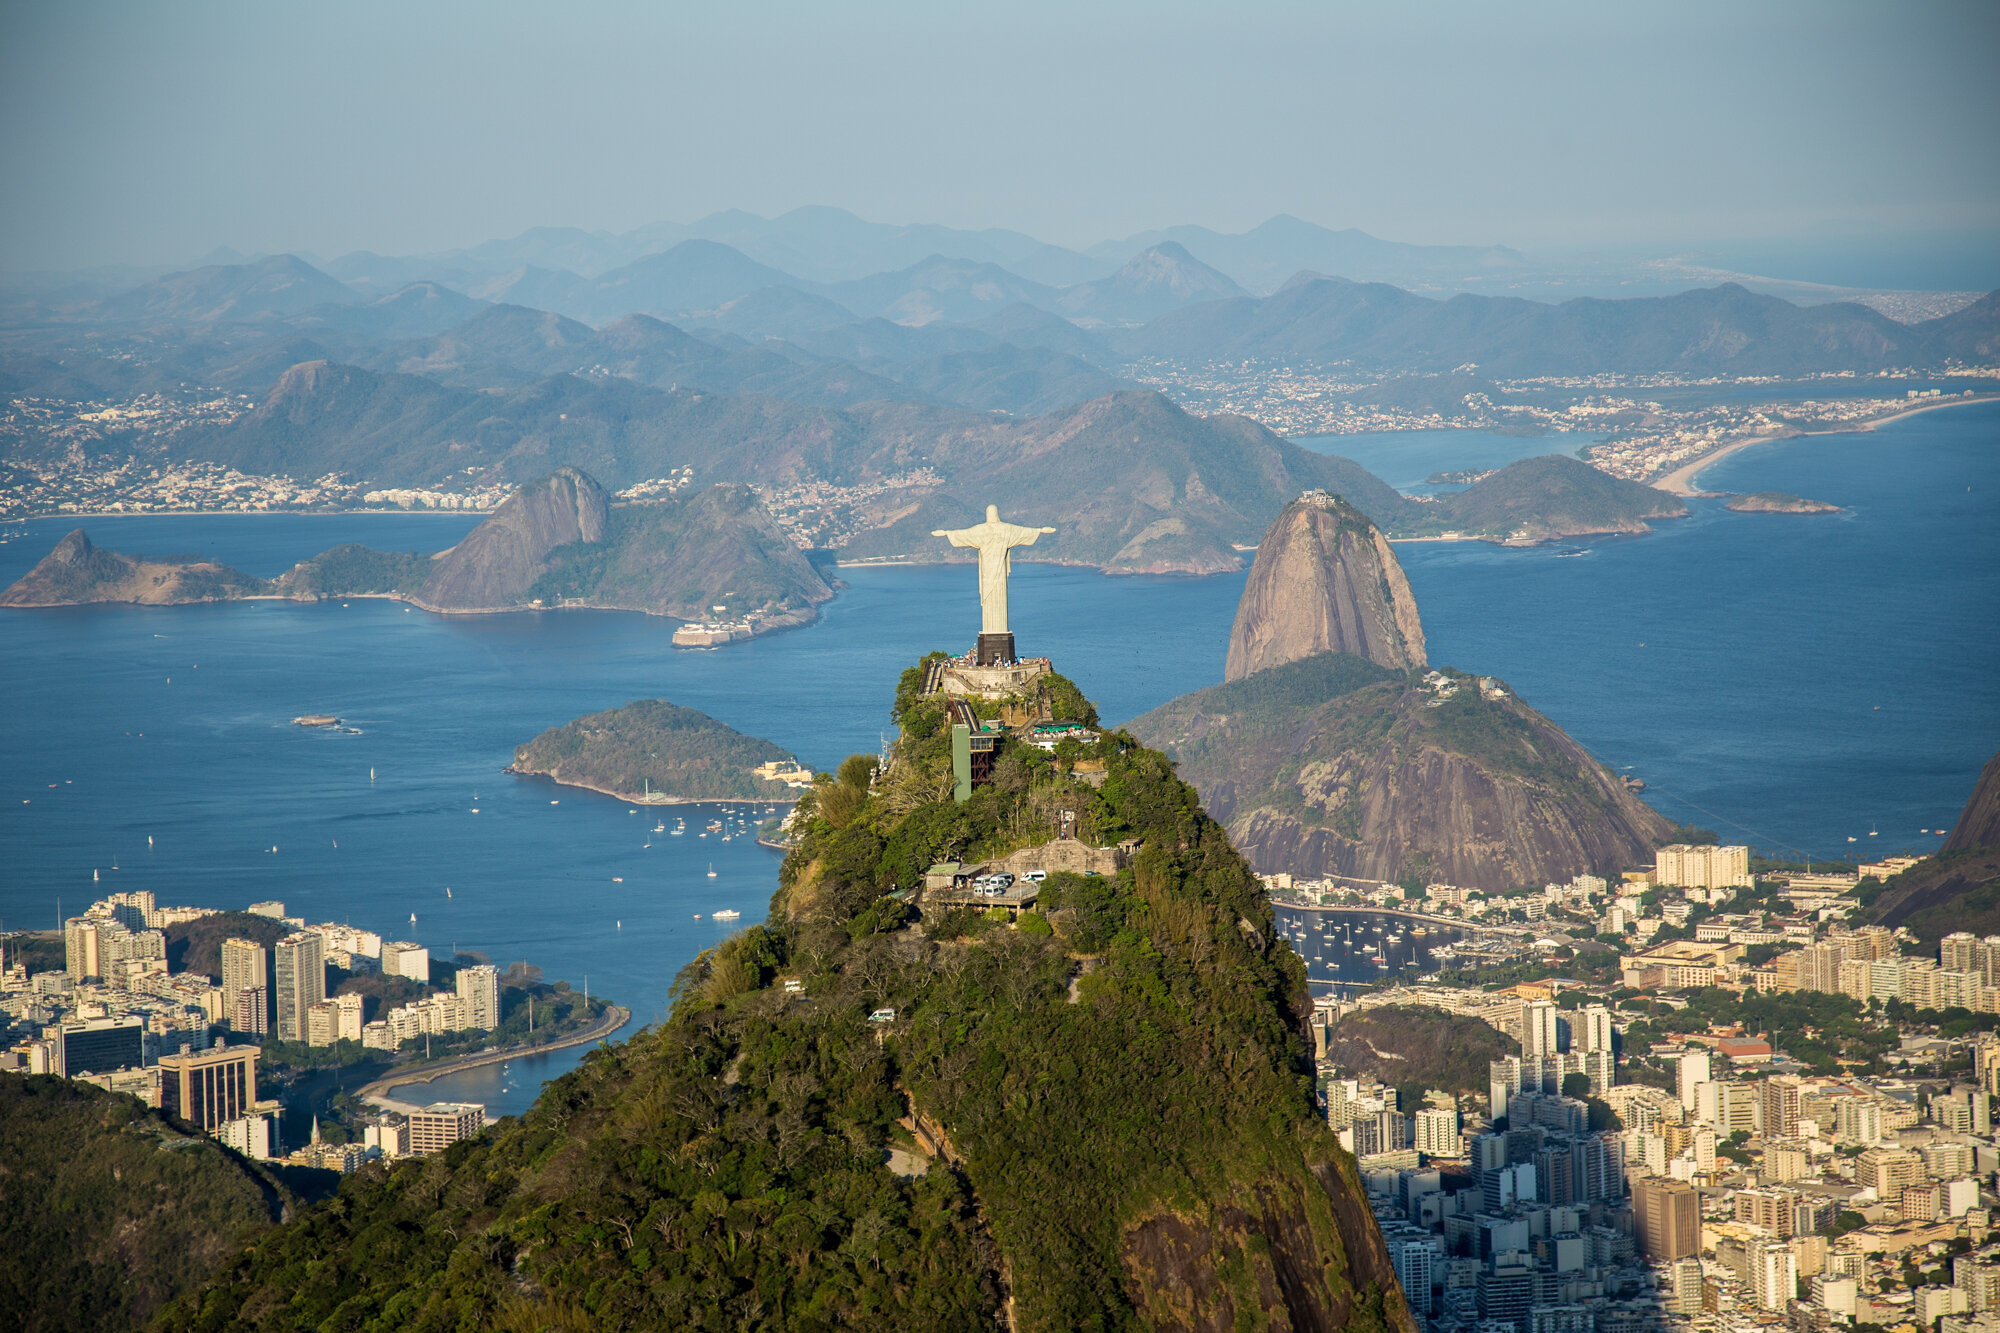
After making one orbit around Sugarloaf, it was time to make our way to Christ the Redeemer. This was the real reason that I wanted to take a helicopter tour. As we approached the statue, I just let my shutter fire one shot after another. I took shots zoomed in and wide angle and shallow depth of field and all types since I knew this was my only chance. As you can see, I took a lot of shots because each one is a slightly different composition. We made two circles around the monument before it was time to head back towards the airport. We were also able to see Maracanã, the soccer stadium, in the distance as we departed back to the west.


I also can’t say enough about the company that we chose to go with, Comandante Nobre. Sonia was very friendly, not just on the day of the flight, but during our whole trip. She stayed in constant communication with Amanda via WhatsApp, each day, giving us updates on the weather and even suggesting must-see places and eateries. I would highly recommend them for your tour if you get the chance to visit Rio de Janeiro.I know that the other companies that are closer to the tourist sites will tell you that you only need the 7 or 10 minutes that they fly you but the truth is, unless you are comfortable shooting aerial photography, you can use the extra time (for less money) that it takes to fly to the sites to practice and get comfortable shooting from a helicopter. Being a pilot and having shot aerial photos many, many times, it is still good to get the feel of the pilot, the aircraft, the surroundings and get your settings dialed in for the light.


Tips for Aerial Photography
Schedule your flight with lighting in mind – During our flight, the light was amazing because we let the company know that were mainly interested in a photography flight. We then worked with them to carefully choose the right day based upon the weather and the right time of day. The sunset was at 5:52PM so we chose to depart at 4:45PM for our 30-minute flight to get that golden light from the sun being low in the sky. Make sure that you let whoever you fly with know your intentions and have them help you choose a day and time that is going to give you the best lighting conditions.
Choose the right equipment – You will need both fast glass and a camera that can do well in lower light situations for a sunset flight. It also helps to have a zoom lens that will allow you to get both wide angle shots as well as detail shots. I chose to shoot with a Canon 6D, which does well in low light situations and a Canon 24-105mm f/4L, which covers a good range. It may be beneficial to have a second body with two different lenses on them. If I had the choice, my second body would have the Canon 70-200mm on it to give me that extra range.
Make sure to get your settings right – Remember that you are shooting from a moving platform. A helicopter is a little more forgiving than an airplane because you are moving at slower speeds but there are still vibrations, wind and some amount of movement (even in a hover). A fast shutter is crucial to getting crisp, sharp shots. I typically shoot anything from the air at nothing slower than 1/400 second. While I often break this rule, it is also a good idea to keep your ISO on automatic to keep up with the constantly changing light conditions. If your camera/lens has image stabilization, check to make sure that it is turned on as well as your autofocus. Make sure to keep your camera set on continuous so you can take multiple photos at a time.
Don’t be afraid to shoot a lot of shots – We live in the digital age, don’t be afraid to use your “film” – Take a lot of photos while you are in the air. You will be surprised how much the smallest movement of the aircraft will completely change the composition of the photo.
Strap everything in – Especially if you are going for the doors off option (which I highly recommend). There is a lot of wind that will come through the cabin and you don’t want to lose anything and you definitely don’t want to drop anything on anyone’s head. Make sure to keep a good grip on your camera, especially if you are putting it outside the aircraft where there is airflow (even in a hover).
If you are afraid of flying or of heights – go anyways!– Amanda is terrified of small planes and helicopters and each time I have to drag her into the aircraft. When it is over, she is always so happy that she went on the flight. It truly is an amazing view and a perspective that not everyone gets to see. You will soon forget that you are in a helicopter and be awe-struck by the beauty of the city. Don’t forget to remove the camera from your eye and just take in the experience.
I hope these tips are helpful and that you enjoy the photos. If you have any questions about flying or aerial photography, let me know. I would also love to hear about your experiences with aerial tours or with aerial photography.